Adding A Hanging Sleeve To Your Quilt
You have finished your quilt top. The quilting is done too. But before you put your binding on, there is one more thing to consider… Do you want to add a sleeve for hanging?
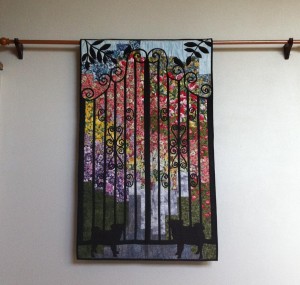
Many quilt shows require a sleeve. And it is nice to be able to slip a dowel in the sleeve and poke a couple of pushpins in the wall to hang your work for display. I have a couple of wooden drapery rods hanging permanently (as above) in my home and it’s so easy to trade out quilts when the mood hits me… If they have a sleeve!
The best time to add a sleeve is along with your binding. Here’s how… (A printable PDf of all this info is available below)
Cut or construct an 8″ strip the width of your quilt. You can use muslin or fabric leftover from the top or back of the quilt or any fabric really. (The nice thing about fabric from the quilt is it keeps some fabric with the quilt in perpetuity should repairs ever become needed.)
So take this strip that is 8″ by the quilts width and press both the 8″ ends under 1/2″ and press then another 1/2″ then stitch that “hem” in place. Now the strip is about 2″ narrower that your quilt and finished on both ends.

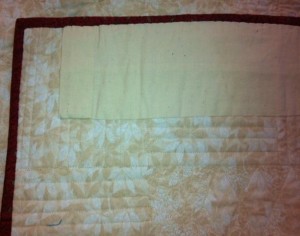
Fold the strip in half longways and pin, centered, to the backside of the top edge of the quit so the raw edges of the strip are even with the top raw edge of the quilt. See the sleeve (tube) that formed? Now apply your binding as normal (see my 7:30 Garage Binding) catching the top of the sleeve at the top of the quilt. Then all that is left is to blind stitch the bottom of the sleeve tube by hand being careful to not stitch through to the quilt front! Good Job!

Want a Quick way to accomplish a faux hanging sleeve for a wall hanging with no hand work? This is NOT what they want at shows but is fine for home use. This works for quilts up to about 36″ wide:
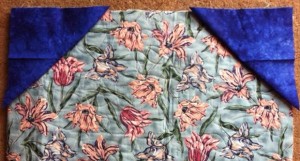
Cut two squares about 1/3 the width of your quilt. So a 36″ wall hanging would need 12″ squares and a 21″ wall hanging about 7″… Doesn’t have to be perfectly accurate.
Take each square and fold on one diagonal. Press. Pin in place on the top right and left corners on the backside of the quilt (as above), again matching the raw edges. Then bind as usual. That’s IT!
The trick here is to cut a dowel that spans from binding to binding less about 1/2″ so it fits snug. These two triangles give you many of the hanging benefits of the traditional sleeve with no hand work!
Unfortunately, they don’t work for my wooden rods! Darn!
Here is a PDF with all of the above info in printable form…
Thanks for stopping by!
Don’t miss all the other patterns available on this site. If you need any of our Quilter’s Alphabet patterns, check the archives. And browse around the site for lots of other free patterns. We are working on our 2012 series of Doll Quilts and lots of swap patterns! And there are even more Patterns on my Etsy site.
And coming soon will be our 2012 Fall Quilts which will be the glorious and historic Burgoyne Surrounded (Supply List now available) and the beautiful Iris Quilt (Pattern coming SOON!). And just posted: The 2012 Sunset and Vine Mystery Quilt Supply List. Clues begin July 3. Lots of great things are happening at LynBrown.com.


